Quick & easy to the perfect stone experience
With Slate-Lite, you are choosing a quality product from the original manufacturer that has been thoroughly tested in all its components - both in our own internal test laboratory and by external testing institutes.
Thanks to the unique properties of Slate-Lite, such as the low overall thickness of just approx. 0.06 inch and the low weight, our stone veneers are easy and convenient to work with - whether you are a professional or an ambitious amateur craftsman.
Our main video gives you an overview of the possibilities that Slate-Lite offers for your building project.
For specific questions, please use our FAQ section below.

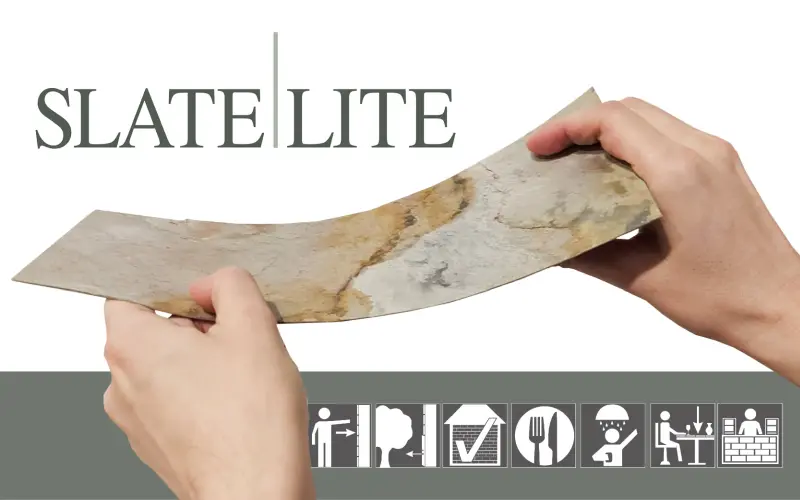
Our Slate-Lite product line is the all-rounder among our stone veneers and is suitable for almost all areas of application.
You can use the fiberglass-reinforced stone veneers here, among other places:
A little tip: If you would like to find out more detailed information about the application at a specific location, simply click on the relevant item and you will be redirected to the appropriate theme world. There you will receive tips and tricks on the use and optimum processing of our stone veneers.
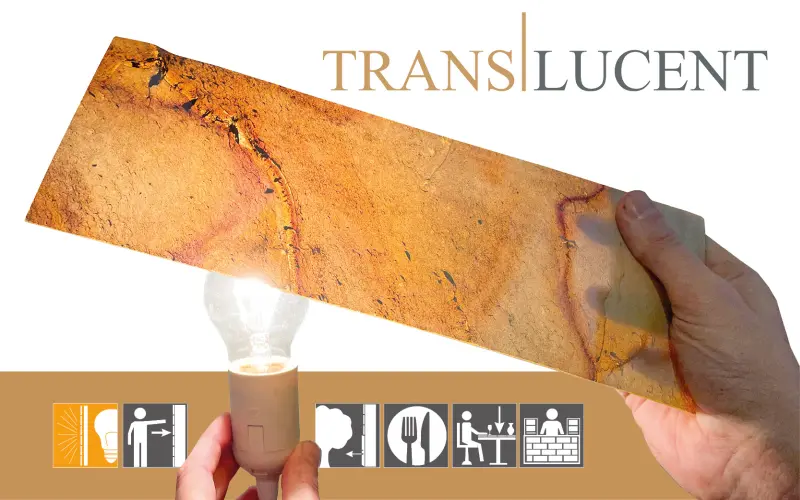
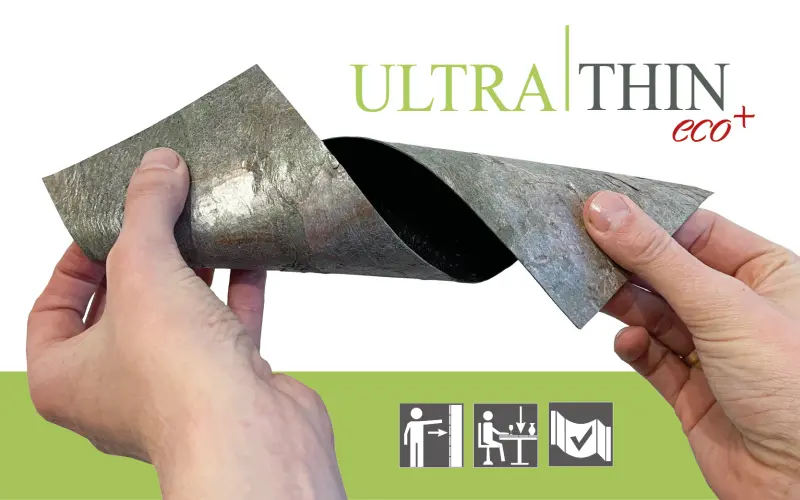
For the creative sector, our UltraThin eco+ product line is the ideal choice due to its even greater flexibility. With our Translucent product line, you can become a
and create extraordinary light objects with real stone!
Our thin stone veneers are suitable for almost all substrates!
You can easily bond our stone veneers to these substrates, among others: Concrete, plasterboard, wood, metal, tiles, plaster, glass etc.
No special preparation is required for "stable" substrates: The substrate simply needs to be smooth, dust-free, clean and dry. Crumbling substrates such as old, flaking plaster or wallpaper that is already peeling off must be primed in advance to ensure a permanent bond between the adhesive and the wall.
Excessive unevenness in the substrate must either be treated with a primer or sanded down.
Our thin stone veneers are available in many different sizes, depending on the laying pattern and spatial effect you would like to achieve.
Our standard sizes are:
- S // 12 x 24 in (bundle 11.64 ft2) *)
- M // 48 x 24 in (8 ft2)
- L // 94.5 x 47.2 in (31 ft2)
- XL // 110.23 x 47.24 in (36,17 ft2)
Due to the ease of processing, our stone veneers can of course also be cut to any desired special size with millimeter precision.
If you do not want to cut and customize the material yourself, you can also have your desired decor produced directly in our store to the millimetre or order a cut of the material via our workbox services.
*) The 30 x 60 cm format is currently available in the Stick&GO! version with self-adhesive film in selected decors.
Cutting our thin stone veneers to size is extremely easy, and almost any standard DIY tool is suitable for this: You can cut Slate-Lite to the required size with millimeter precision using a hand or table saw, jigsaw or multitool.
Simply cut the stone sheet from the back using a wooden or plastic saw blade with medium teeth. If necessary, then lightly sand the cut edge with sandpaper.
Bonding the Slate-Lite stone veneers is extremely simple:
Simply apply the adhesive to the back of the stone sheet or directly to the mounting surface, press the stone veneers into place - DONE!
In the following video, we show you how to apply our recommended Slate-Lite Extreme Adhesive.
This ready-to-use MS adhesive is simply spread with a B3 notched trowel. Make sure that the adhesive is evenly grooved and do not smooth it out.
Then press the Slate-Lite stone veneer onto the desired area with light and even pressure or a pressure roller and that's it!
To achieve an optimum result, work with a spirit level.
Adhesive residue on the sheet can be removed with our special cleaners.
The stone surface of Slate-Lite can be drilled through with any standard (stone) drill.
Nailing and screwing is also possible without any problems.
Of course, you can also press Slate-Lite onto a variety of different substrates if required. These can include MDF, chipboard, plywood, multiplex, HDF or AluDibond.
We recommend the use of a backing paper of approx. 120 g/m² or another laminate (HPL) to avoid cupping due to the surface tension of the stone layer.
Depending on the installation location, you can use Slate-Lite without additional surface protection, for example in indoor are
as with low levels of stress.
For applications in areas with high loads, such as the kitchen or in the shower and bathroom, we recommend using an additional impregnation or sealant.
This is usually applied to the stone surface with a foam roller in a criss-cross pattern; this can be done before or after installation.
For detailed instructions on the protective products, please refer to the respective data sheets and recommendations in our theme worlds. In the following video we show you an example of the simple application of our strongest sealer Slate-Lite Extreme Protection.
Slate-Lite can be cleaned with all commercially available, non-corrosive household cleaners.
In most cases, clear water and a lint-free cloth or brush will suffice.
In outdoor areas, cleaning with a high-pressure cleaner is also possible, but please observe the distance recommended by the appliance manufacturer when using it.
Slate-Lite ► The all-rounder for all applications
You can find all the information and specifications for Slate-Lite in our data sheet and detailed processing instructions, which are available to download here:
UltraThin eco+ ► The flexibility miracle
All information and specifications of UltraThin eco+ can be found in our data sheet and the detailed processing instructions, which are available for download here:
Translucent ► The translucent stone veneer
All information and specifications of Translucent can be found in our data sheet and the detailed processing instructions, which are available for download here: